
Introduction
The core of tagtog the text annotation editor for data augmentation. This editor is designed to make the user feel comfortable annotating text. We have created a minimalist user interface to interfere as little as possible in the reading experience to increase annotator's focus and the efficiency during annotation tasks.
The annotation editor is used to manually annotate text or/and train a machine learning model to automatically annotate text. By enabling automatic annotations you can build awesome stuff you didn't think of at first.
This web editor includes features as automatic annotations, overlapping text annotations or support for full-text articles, that reduce significantly the time required to annotate text.
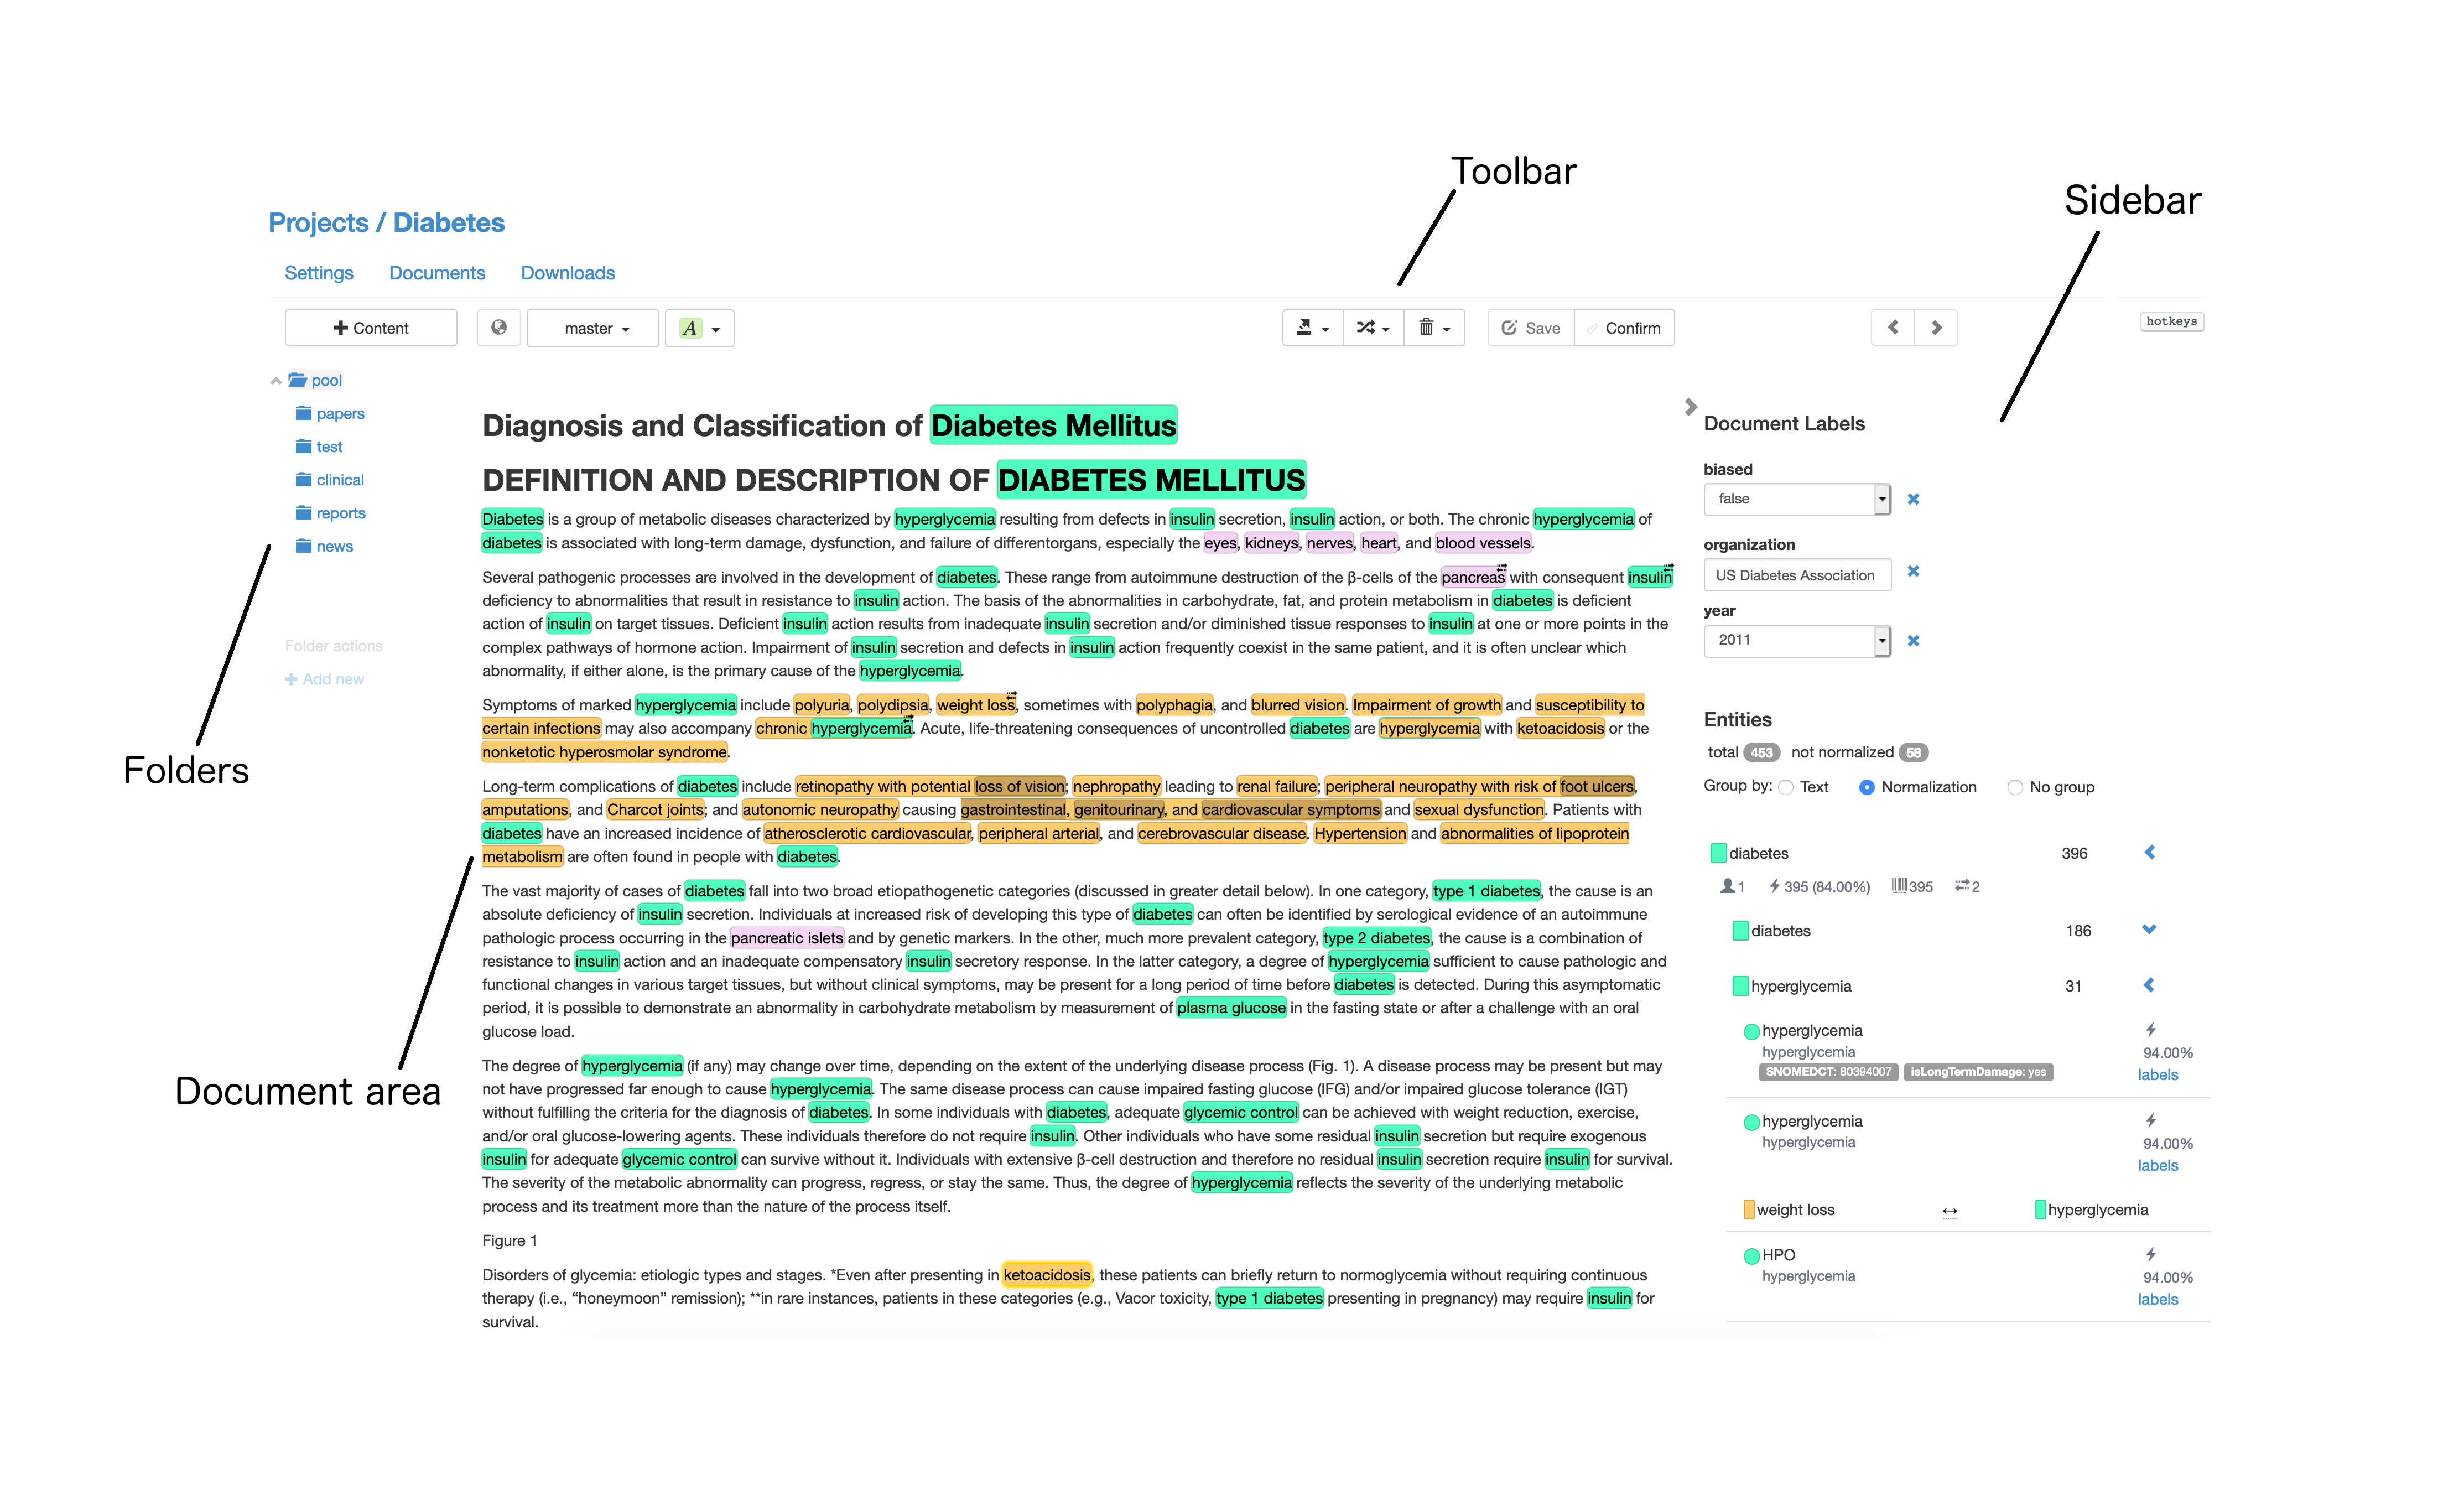
tagtog annotation editor with text span annotations, entity labels, normalizations and document labels. The editor is mainly divided into: Document area, Folders, Toolbar and Sidebar.

Annotation types
You can annotate at text span level or at document level. Let's take a look to the type of annotations you can create using tagtog:
| Annotation type | Description |
|---|---|
| Entity | Span of text representing a named entity. It can be any span: a part of a word, a word, a sentence or a group of words. Each entity belongs to one or more entity classes (e.g. Barack Obama is person and politic). Overlapped annotations are supported. More. |
| Normalization | Id assigned to a named entity. These annotations help in disambiguation (entity linking). Normalization or canonicalization is the process for assigning an id or unique name to data that has more than one possible representation. This process is supported by dictionaries. For example an air filter in automotive can make reference to a cabin air filter or an engine air filter. With tagtog you can assign the correct reference to the entity. Each entity can have assigned one or more Ids (e.g. Id from Wikipedia, and an Id from your internal database). |
| Entity label | Label ( Let's say you are extracting technical issues from reports in a CRM. When annotating those reports, you can add extra information to those entities (technical issues), for example severity. You can use this metadata to build a statistical model that retrieves the severity given a particular technical issue in a specific context. |
| Relation | Relation between two named entities. Each relation belong to one specific relation type (e.g. BRCA2 Currently tagtog supports bidirectional relationships (A relates to B, and B relates to A) to connect two entities. If you want to connect more than two entities you need to create more than one relation. In order to set or see relations, remember you need first to define at least one Relation Type in Settings > Relations. Otherwise the option to See or Add relations in the menu will be disabled. Relations are supported between entities from different paragraphs or sections. |
| Document label | Label ( For example, if you are classifying emails in order to dispatch them to different departments, you can create a document label (enum) and classify emails as, for example, |
Hotkeys map
At the top-right corner of the editor, you find a hotkeys icon. If you hover the mouse on this icon, the list of hotkeys is displayed.
| Hotkey | Description | Availability |
|---|---|---|
| [ | Previous document in the folder | Any document |
| ] | Next document in the folder | Any document |
| s | Save document | Any document |
| r | Start Document Review | Any document |
| t | Start a new relation | Any document. Only when the annotation menu is visible or in Document Review mode. |
| d | Delete annotation | Any document. Only when the annotation menu is visible or in Document Review mode. |
| l | Show entity labels | Any document. Only when the annotation menu is visible or in Document Review mode. |
| ctrl+c or command+c | Copy annotation text | Any document. Only when the annotation menu is visible or in Document Review mode. |
| q | Previous page | Only for paginated documents as PDFs |
| w | Next page | Only for paginated documents as PDFs |
| z | Zoom Out | Only for paginated documents as PDFs |
| x | Zoom In | Only for paginated documents as PDFs |
| ctrl+f or command+f | Search in the text of a document | Only for paginated documents as PDFs |
| ctrl or command | Annotate the whole paragraph. Hold the key and click on the paragraph to annotate it. | Supported by all formats except for paginated documents. |
Components
The editor is mainly divided into: Document area, Toolbar and Sidebar.
Document area
The text is displayed in the document area. There you can read and annotate text.
Text annotations
Once a piece of text is annotated, it becomes an entity. In tagtog you can operate with entities and do things as normalize them, relate them, etc.
The background color of each annotation depends on the color picked for the Entity Type. The font color changes based on the background color so the contrast is appropriate to read.

In green the gene names, in red the mutations. Font color change depending on the entity background color
Create new text annotations
A new text annotation is created by highlighting text with the mouse. Position the cursor at the beginning of the text you want to highlight. Press and hold your primary mouse button (commonly the left-button). While holding the mouse button, drag the cursor to the end of the text and let go of the mouse button. Once completed, all the text from the beginning to the end should be highlighted using the same Entity Type used in the previous text annotation. Currently the only way to change the entity type used for new annotations is by first changing the entity type of existing annotation.
Tips & tricks:
- If you double-click, you annotate the word clicked.
- If you try to annotate a word that starts or ends in space, the space won't be annotated.
- Press and hold the ctrl or command key to annotate a whole paragraph. Simply hold the key and click on the paragraph to annotate it.
Annotating paragraphs with one click
Overlapping text annotations
Just create a new annotation that is contained within the span of existing one or that only overlaps part of it. Overlapping text annotations are recognizable at a glance while not disturbing you from reading the text.

Example of contained annotation, the car make Toyota is contained in the model Toyota Corolla

Three entities annotated, two annotations are overlapping

Sample of customer feedback. Two annotations (first in pink, second in yellow) within the same span representing a vehicle part and the failing part.
Pre-selections
Automatic annotations created upon the manual creation or removal of other equal annotation (same entity type and same text). These type of annotations increase annotator's efficiency as potential candidates for new/to-remove annotations are automatically identified.
Pre-selections also work in the PDF annotation tool.
| Type | Description |
|---|---|
| Pre-selection | Equal entities that are annotated upon manual annotation. E.g. if you annotate 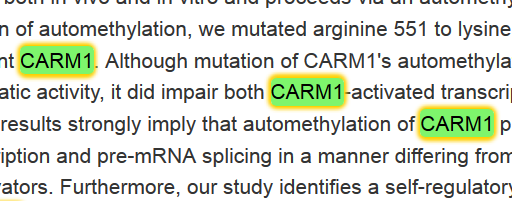
In addition, if you add/remove a normalization or entity label for this entity, this change will propagate to all pre-annotated occurrences. |
| Pre-deselection | Equal entities that are removed upon manual removal, e.g. if you remove an existing annotation with the text "HER2" and Entity Type 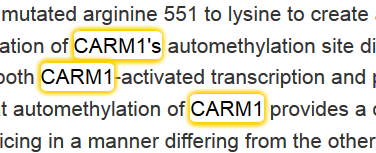
|
You can choose whether pre-selections are case sensitive or not. As other properties from pre-selections, this setting can be changed both directly in the document toolbar and/or at the project level.
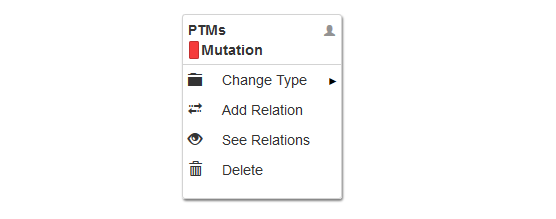
Annotation Menu
By clicking on the primary mouse button (commonly the left-button) on a text annotation, you display the annotation menu.
These are the actions you can perform:
| Action | Hotkey | Available in read-only mode | Description |
|---|---|---|---|
| Delete | d | No | Delete annotation |
| Labels | - | Yes, read-only | Go to the entity labels menu |
| Permalink | - | Yes | Show a dialog box with a permalink for the annotation. |
| Add relation | r | No | Start a relation if a Relation Type is defined for the Entity Type of this entity. Once the relation is initialized, you can see highlighted the annotations you can relate your entity to. Other annotations are faded to indicate that you cannot relate the entity to these. Click on one of the available entities to set the relation. From that moment, both entities will be connected. Both entities will display this icon on the top |
| See relations | - | Yes | See the relations this entity is part of. |
| Change Type | - | No | Change the Entity Type of entity. If you hover the mouse on this menu item, the list of possible Entity Types and their descriptions will show up. This list is sorted alphabetically. The first item is always selected by default and you can change to this entity type by clicking or pressing ↵. You can filter the entity types by name or description. Just type in the searchbox and the entity types with matching description or name will be listed. The list is navigable by keyboard. Move with ↑ ↓ and select with ↵. A change of entity type can affect the properties of the entity. Normalizations will be removed and only common entity labels will be preserved. |
| Copy text | ctrl+c or command+c | Yes | Copy the text of the annotation to the clipboard. |
| Normalizations | ↵ | Yes, read-only | Each dictionary created for the entity type will appear as an input box. If the box is not empty, the entity is normalized to that value. If you type at least 3 characters, a list of recommended dictionary entries will appear. To select a normalization simply choose an entry. Otherwise you can type a new value. Each time you type or you select a value, the normalization is stored in the data model. Press the + button to add the value in the input box as a new entry for the dictionary. Instead of clicking the button, while you type a value, you can simple click the ↵. If the entry is correctly added to the dictionary, a checkmark will show up during 1 second. |
Update dictionary from annotation editor
If you are using dictionaries, you can updated them upon manual normalization. If you add a new normalization and you click on the + button, this will either add a new entry to the dictionary or update an existing entry with a new term. By design, the dictionary won't be updated when a normalization is removed.
You can always download the most updated version of a dictionary at Settings > Dictionaries.
Permalinks
You can create permalinks for annotated entities. Just click on the entity and click the Permalink entry in the annotation menu. You can copy and share it. When opened, the link points exactly to the annotation, the document editor will scroll to highlight the annotation properly.
Toolbar
The toolbar is located on the top of the document area. From it you can perform these actions:
Original source 
In case the document or text comes from a known provider, clicking this link you access the original source.
For example, if you upload a PubMed document by PubMedId (PMID), tagtog understands the source. Clicking on this button you will go to the article in Pubmed.
Annotations from other users
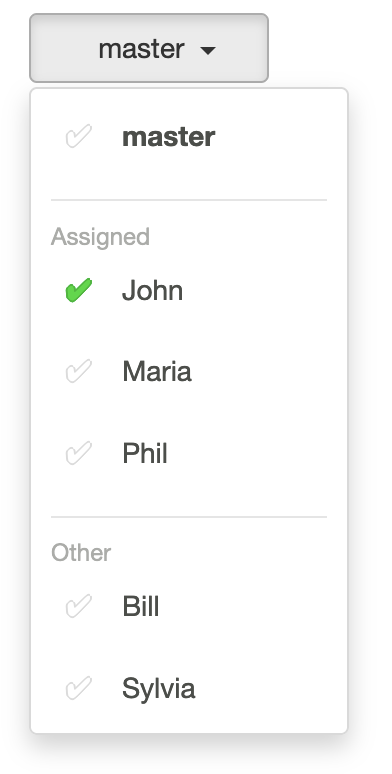
Each document has a master version and one separate annotation version per project member.
Click on the user list to show the different versions available. Click on any of these annotation versions to load it in the document editor area.
Depending on your permissions you can/cannot edit the different annotation versions. A locker icon ![]() indicates that your permissions for that version are read-only.
indicates that your permissions for that version are read-only.
For each version listed, there is a checkmark indicating if that version is confirmed (green) or not. If you hover over the username, the role is displayed.
If Task Distribution is active, the list of versions is split into two groups: members assigned to the document (this document was distributed to this member), and members not assigned to the document (“Other”). If Task Distribution is not active, all suitable members’ versions are listed.
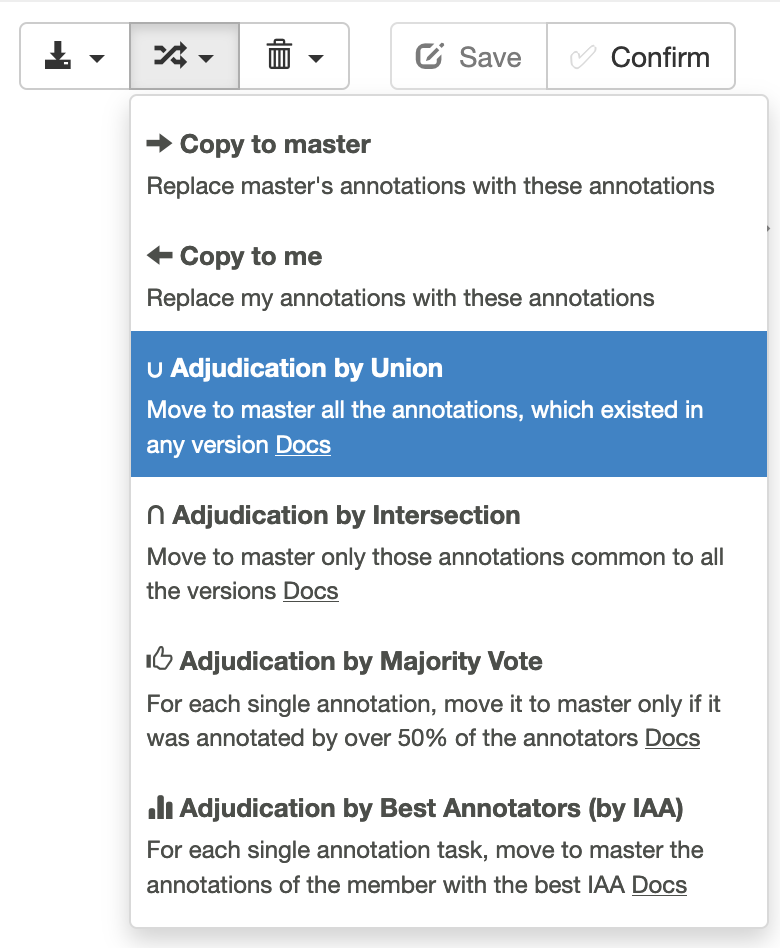
Manage annotation versions
You might want to start from the annotations of other user or replace the master version with the annotations of a specific user. If different users have annotated the same documents, tagtog also supports an automatic adjudication process to compose the final version of the annotations based on the agreement among users. For such cases, you can use the options available ![]() in the toolbar.
in the toolbar.
If you click on that option, a list of actions shows up:
| Action | Description |
|---|---|
| Copy to master | Replace master's annotations version with the version displayed in the document area. |
| Copy to me | Replace your annotations with the version displayed in the document area. |
| Merge Annotations | Automatic adjudication process that merges all the member's annotations into master. tagtog has built-in multiple merging automatic strategies. |
The availability of these options depends on the role permissions. More information on multi-user annotation
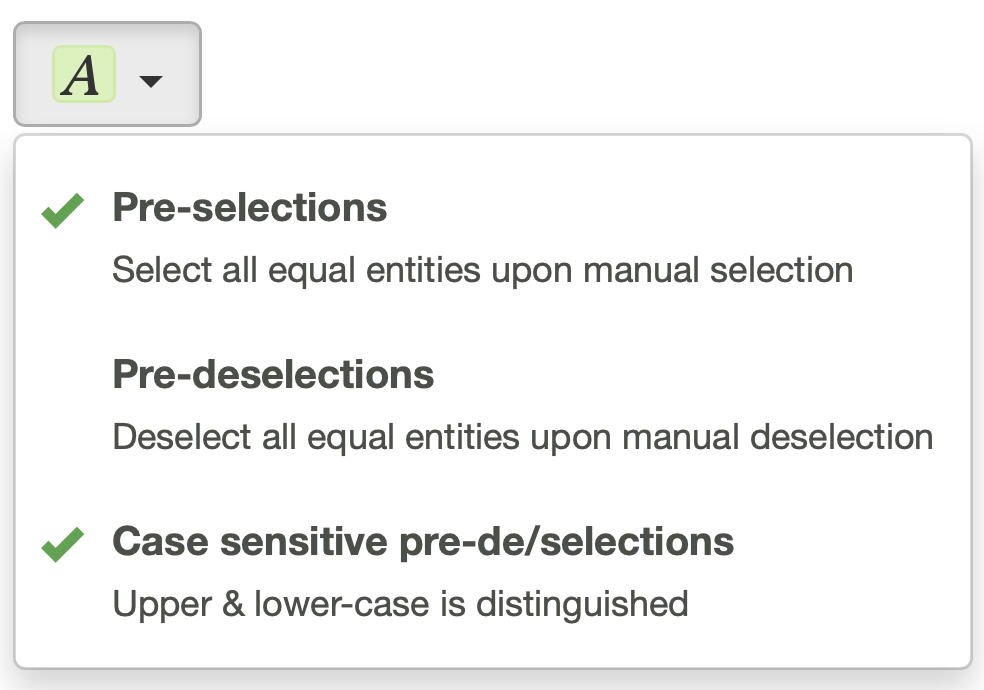
Pre-selections
Here you can turn on/off pre-selections or pre-deselections. You can also turn on/off case sensitivity.
Each time you load a new document, the default settings from your project will apply. The changes in this menu won’t change the default values. That is, the changes here only affect the current document.
Save a document
Each time a change is made in the document (e.g. new annotation or relation added), the Save button will turn into green to indicate there are changes to save. Click the button  to save the changes.
Confirm a document
Usually users confirm the document once the annotations has been reviewed. This is used to indicate that this document can be used as training data for AI, or simply that all annotations has been reviewed by a human. There are different annotation flows you can use for your project.
To confirm a document click on the button with the icon 
Once you have confirmed a document, many actions are disabled. You can undo the Confirm action by clicking again the button. It is a toggle button.
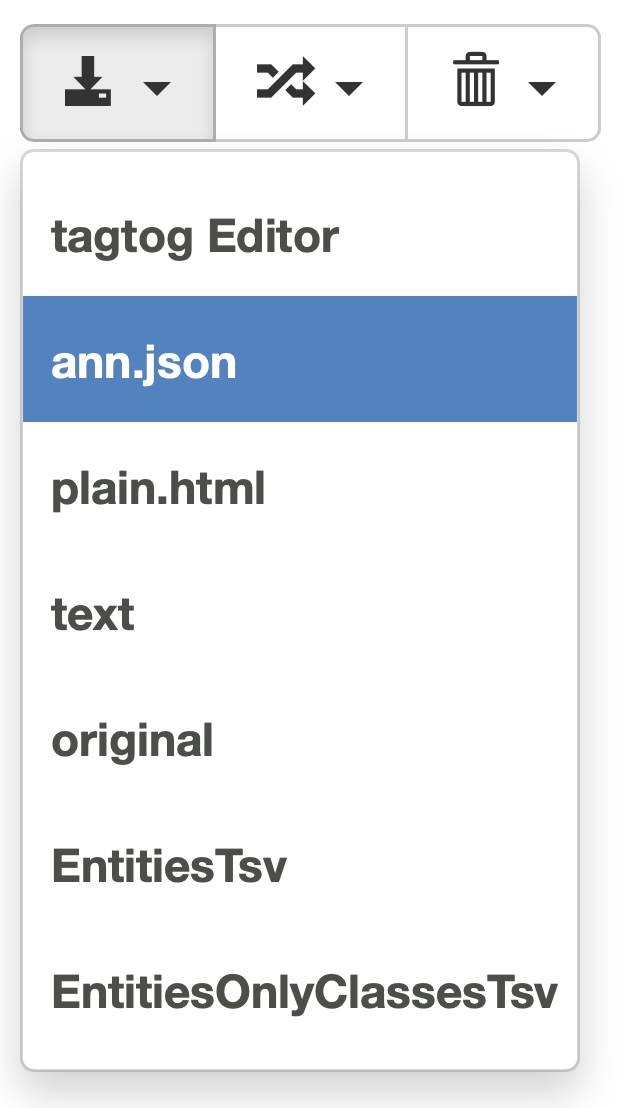
Download / View / Export
Here you can select which way you want to display or export the annotated document.
Annotated documents can be exported into various formats: output formats.
The tagtog Editor refers to the visualization of the annotated document in the annotation editor.
Remove annotations
Click on the button with the icon ![]() and select the option
and select the option Remove annotationsto delete all the annotations in the current document. This won't remove the document.
Remove document
Click on the button with the icon ![]() and select the option
and select the option Remove documentto remove the document from the folder.
Document navigator
Each button with an arrow pointing to left and right. If you click on the button with the left arrow, the previous document in the folder will be loaded. If you click on the button with the right arrow, the next document in the folder will be loaded.
Under the document navigator, you can find the document index. This will give you an idea of where you are and how much work is left.
Page navigator
If the document is paginated, the toolbar has a controller to navigate across the pages. For example, in PDF documents. More information.
Sidebar
The sidebar appearance changes depending on how you configured your project. It will only display those actionable items for those entity types, entity labels, document labels or relations used in the project.
You can show/hide the sidebar by clicking on the arrow ![]() near the top of the sidebar.
near the top of the sidebar.
These are the components you can find in the sidebar:
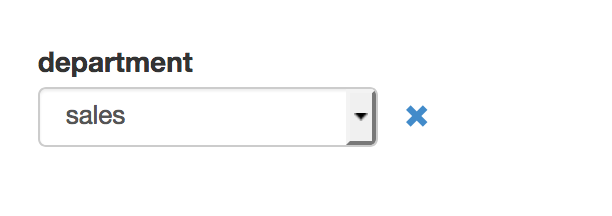
Document labels
If you have any document label configured at Settings > Document Labels they will appear in this section in the side bar. Here the user can define the value of a document label for the current document. Once a change is made, you can save the document as usual.
The list of document labels is sorted alphabetically.
Clicking on the icon ![]() you reset the label to the default value
you reset the label to the default value ?
Entity tally
The entity tally displays a summary for the entities annotated in your current document.
On the top of this section you find some statistics with the number entities annotated and the entities not normalized. E.g.  . Below the header, you can find a summary for the entities annotated in the current document. For example:
Entities are classified under Entity types. For each type some statistics are displayed: number of entities, manual annotated entities, automatic annotated entities, normalized entities
If you click on an entity, the entity is highlighted in the text and the Document Review starts with this entity. If you click again on the entity, you get out the Document Review mode
To quickly digest the status of the annotated entities, you can:
Group entities
Filter entities
Group entities
Classify entities in different groups.
| Group by | Description |
|---|---|
Normalization |
Group annotations by normalization. Very useful to understand which concepts are annotated in the current document. This option doesn't appear if you don't have dictionaries associated to your project. Entities not normalized are highlighted to spot them at a glance. Clicking on the icon |
Text |
Group annotations by text. It is very common that in the same text, the same entity is repeated multiple times. Sometimes it is better to understand that only two unique entities have been identified in this text, e.g. gene BRCA2 and gene HER2 instead of getting the total number of annotations, included repeated ones. |
Entity label |
Group annotations by entity label. Check whether annotations have been labeled or not. Check the list of annotations labeled with a particular entity label. |
No group |
Entities are not grouped. They will appear one by one, in the same order they appear in the text. This is very handy if you need to review each single annotation. Soon we will enable hotkeys so you can navigate this menu fast and easily. |

Entities grouped by normalization. If you click on any of the annotations listed, the annotation will be highlighted in the text of the document area.
Filter entities
You can display entities that meet certain criteria.
You decide whether you want to apply the filter only to the entity tally or extend the scope to the document. To control this functionality, there is an Apply to document switch available: 
Off: show the resulting entities only in the entity tally. Only those entities meeting the filter criteria are listed.
On: show the resulting entities in the entity tally, and in the document. In the entity tally, only those entities meeting the filter criteria are listed. In the document, these entities are visible, the rest are hidden (visually almost transparent).

Example of a filter applied to a document. Notice that the entities filtered out are hidden (visually almost transparent). In this example, the document is styled using tagtog blocks.
You can filter entities by the following properties:
| Filter by | Description |
|---|---|
Entity type |
Select one or more entity types to display entities that belong to one of those entity types. This filter only shows up when there are two or more entity types defined in the project. |
Entity text |
Display entities which text includes the search query. This filter only shows up when there is at least one entity type defined in the project. |
Entity label |
Select one or more entity labels to display only entities with all those labels. This filter only shows up when there is at least one entity label defined in the project. |
Entity label value |
Type the value of an entity label to only display those entities with at least one entity label with that value. As there can be a large number of entities, the match is exact. As you type, a list of recommended values appears in a drop down menu. This list is generated using fuzzy search against the possible values of those entity labels with type This filter only shows up when there is at least one entity label defined in the project. |
Entity probability |
All the entities with a probability lower than the value indicated in the range slider will be selected. The idea is that you can focus on the entities with low probability. This filter doesn't take into consideration the probability of other annotation tasks within the entity (e.g. entity labels, normalizations, relationships). This filter only shows up when there is at least one entity type defined in the project. |
To reset the filter to the default values, there are two options:
Reset each filter property independently: click on a ![]() icon near the property.
icon near the property.
Reset all filter properties: if the filter is active, an option to reset the whole filter shows up on the top of the filter.
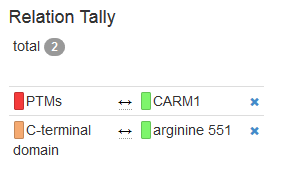
Relation tally
It keeps the count of the relations defined in the current document. In this section you can remove existing relations, clicking on the button ![]() .
.
This tally only appears if you have relation types defined at Settings > Relations.
Document Review
If you want to review a set of entities from your document, you can use the Document Review mode:
1Using the filter, select the entities you want to review. For example: review all the entities under 0.7 probability threshold.
2Press the hotkey r to start the Document Review from the first entity. Alternatively, you can click on an entity in the Entity tally to start from that entity. Use ↑ and ↓ to navigate across the matching entities. For each entity, using hotkeys, you can perform the following actions:
| Hotkey | Description |
|---|---|
| d | Delete entity |
| l | Show/Edit entity labels |
| t | Add relation |
| command+c ctrl+c | Copy entity text |
Click on an entity in the text or press ESC to exit the Document Review mode.
Document Review. In this example, we first filter the entities by text, and next, we review the resulting items performing some actions with the keyboard (change entity labels, creating a relationship, and removing the last entity)
Folders
Folders can be accessed from the document pool or the web editor. You can find the folders panel of the left side of the editor. More information about folders.