
A project is a collection of documents and rules to annotate documents manually or automatically.
Create a new project
Once you have signed up and you have a user account, you are ready to create a new project.
1Set the name for your project.
2Set an optional description for your project. Moreover, each project has a Guidelines section where you can go into detail about the characteristics of your project.
Project settings
If you selected some machines when you created your project, you probably want to start importing text to tagtog. Otherwise, you need to configure the project's settings either to annotate manually or automatically.
Guidelines
You can write the annotation guidelines for you or your team. It should define what and how to manually annotate. The more clear it is, the better the annotations and the training data you can generate.
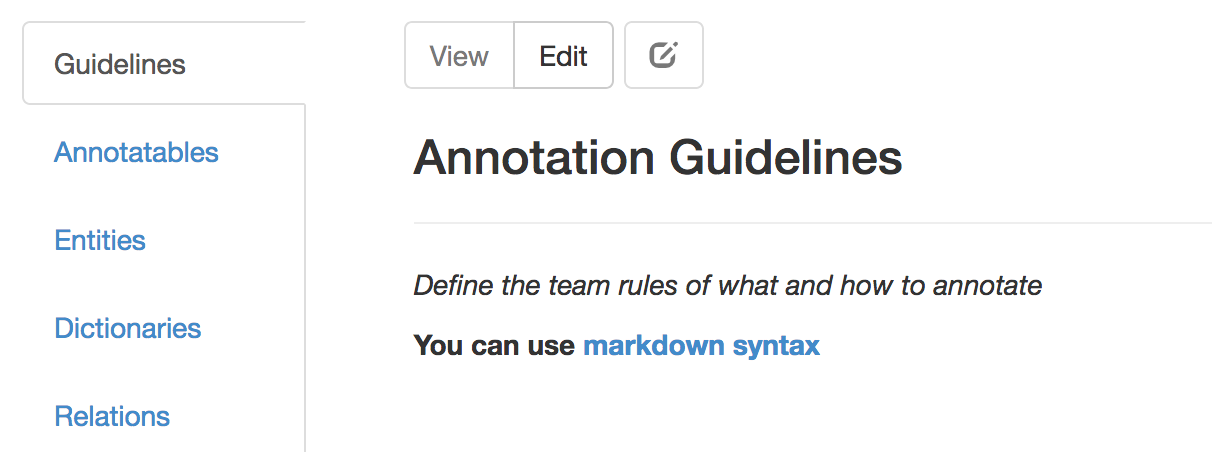
Clicking on Edit you turn on the mode to edit the guidelines. Clicking on View you are on the preview mode and you can see the results of your changes. Once it is ready, just save it ![]() .
.
Only users with admin role (or a custom role with enough permissions) can edit the guidelines.
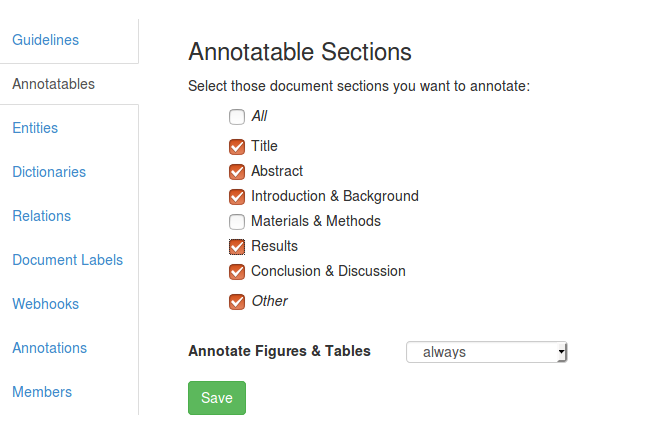
Annotatable sections
Here you select which sections you want to manually or automatically annotate in supported scientific papers (papers should be imported in XML format. Here is the list of supported XML formats). The available sections are: Title, Abstract, Introduction & Background, Materials & Methods, Results, Conclusion & Discussion, Other. The sections not selected will be grayed out in the editor and manual annotations disabled.
You can also select how to annotate Figures & Tables as in always, never or section-dependant.
To disable manual annotation, uncheck each section. Users will be able to read text in the editor as usual, however manual annotation won't be possible.
Entities
Here you should define what type of information you want to annotate manually or automatically. Meaning, which type of information you want to identify or annotate in text. You achieve this by defining Entity Types (a.k.a. Entity Classes).
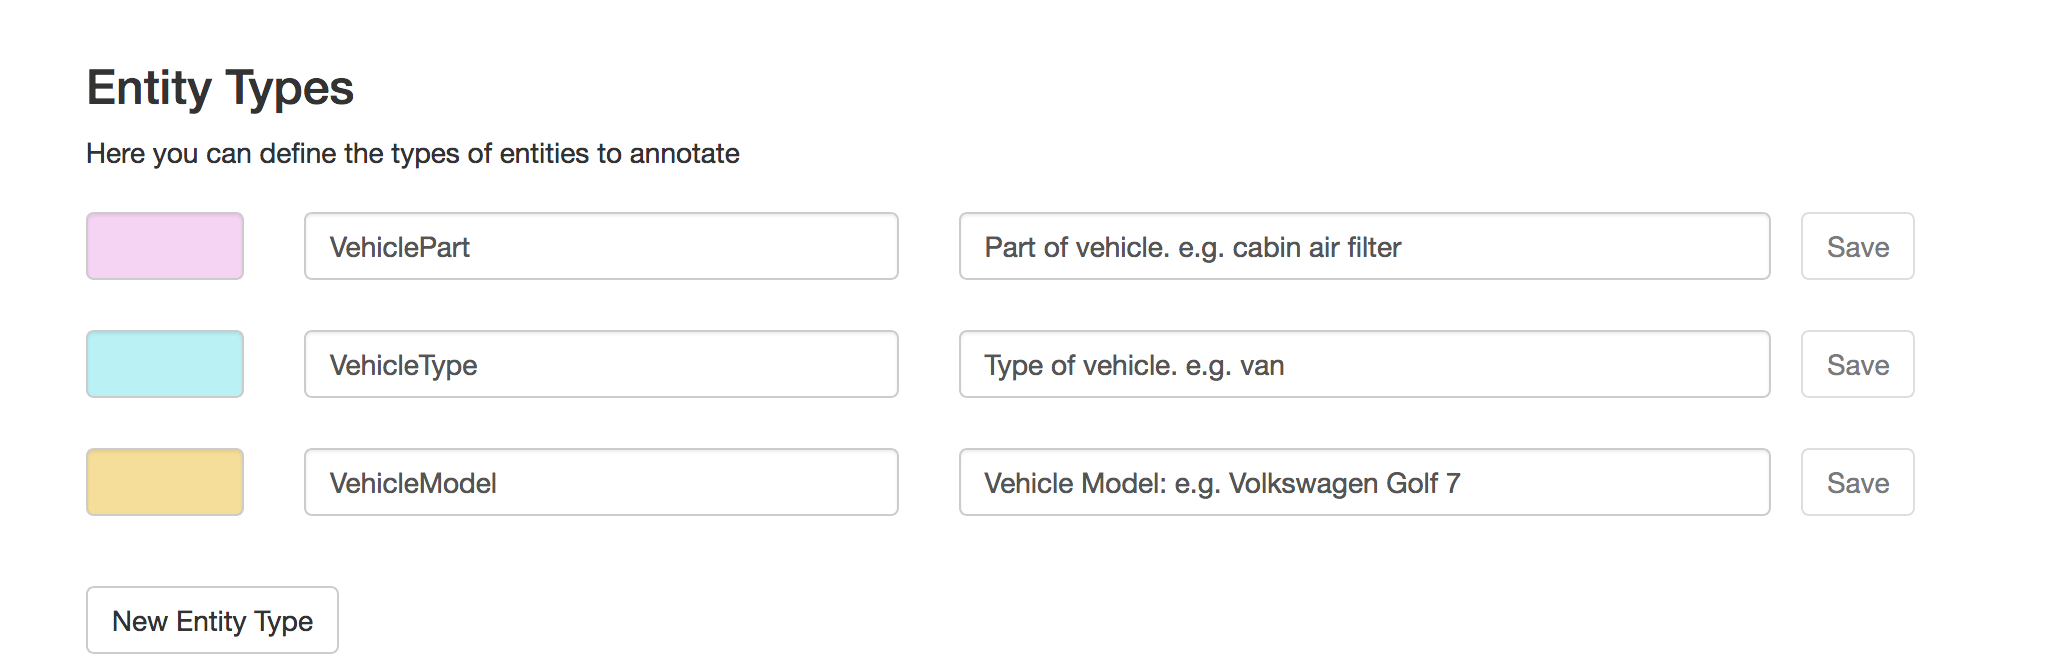
You define entity types from the user interface
You must add one or more entity types. Each entity is defined by a name, description (optional) and color. For example in the project in the picture above we want to extract vehicle information and for that we have created entity types to annotate vehicle parts (vehiclePart), vehicle types, (vehicleType) and vehicle model (vehicleModel). In order to easily identify the entities in the text, we will assign to each entity type a color.
Dictionaries
As soon as you create one entity type, this will appear in the Dictionaries panel. Each entity type can have associated one or more dictionaries (Dictionary format). From here you can upload, replace or download dictionaries.
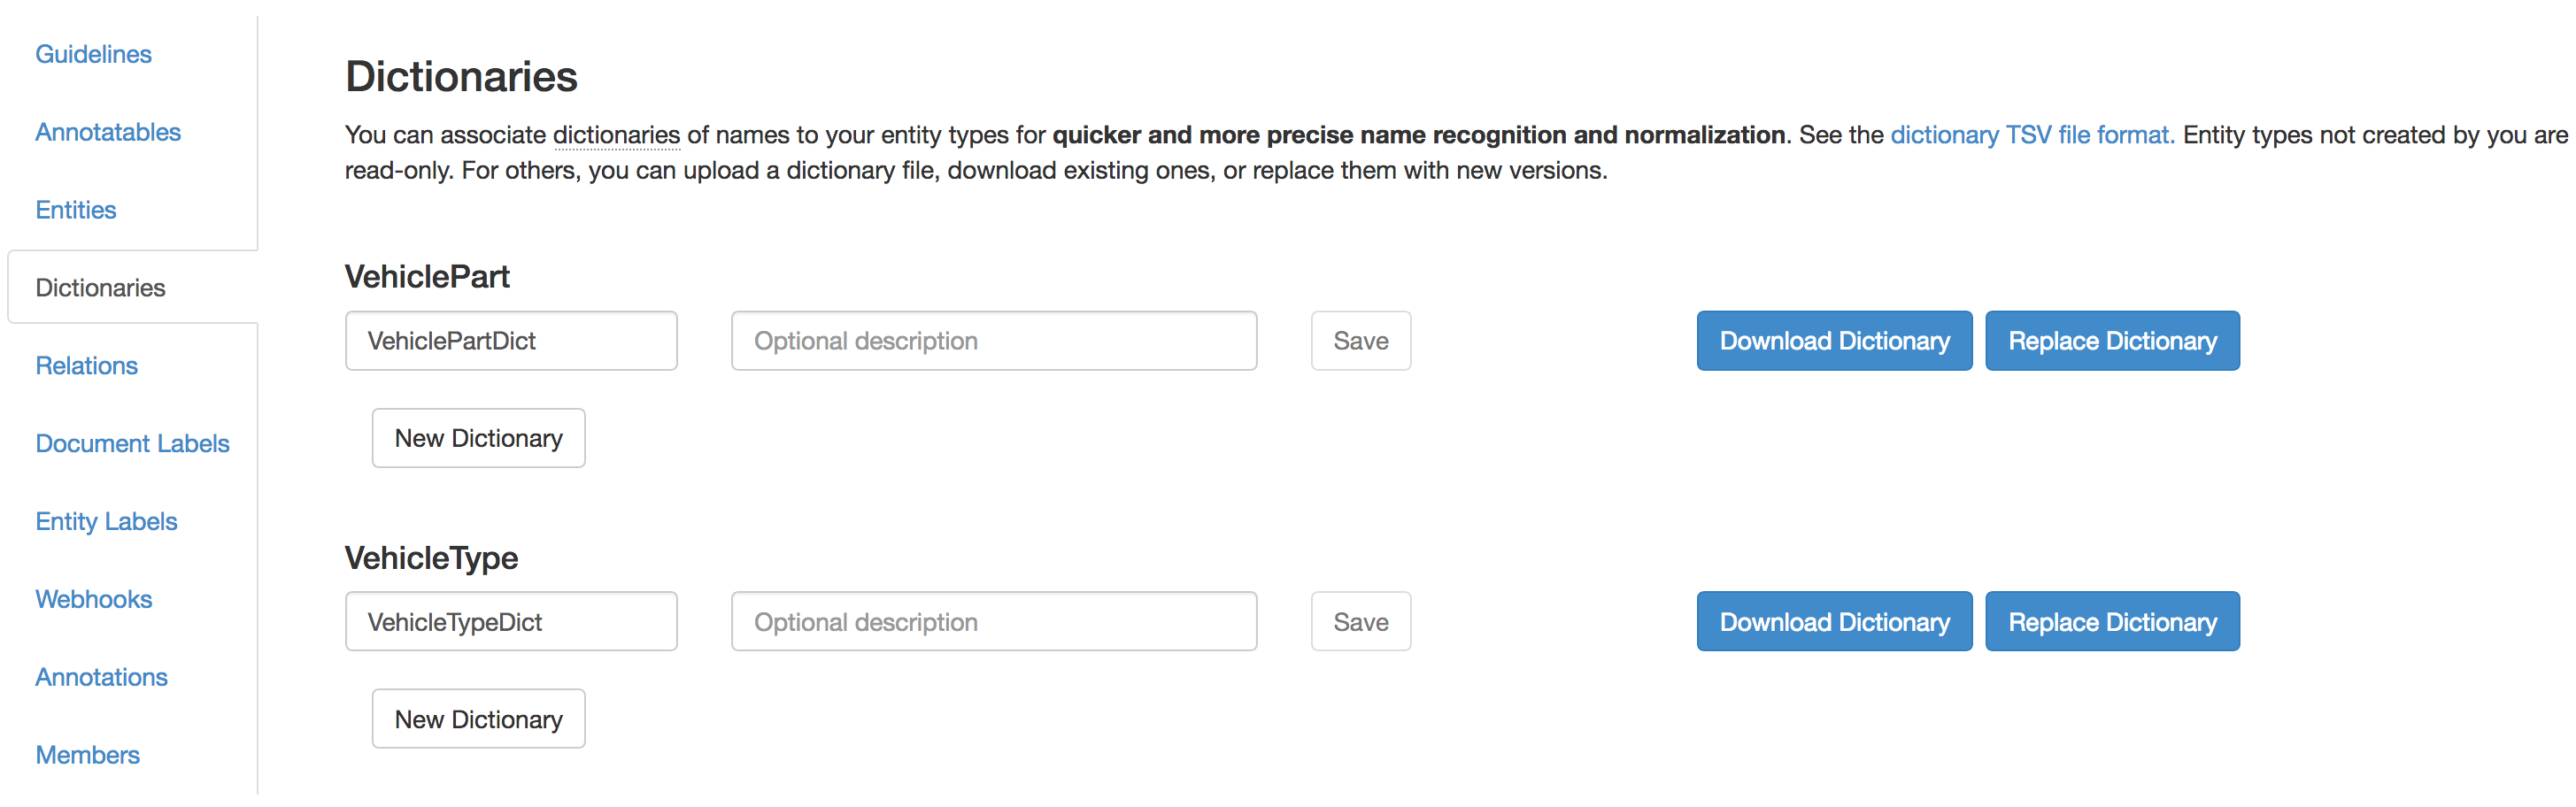
Once you have created a dictionary, you can upload/replace or download the dictionary file
As an example of dictionary, let's use the entity type vehicleModel. For example, Volkswagen Golf 7, Golf Mk7 and Golf VII all identify the same canonical or unique object, this object can be identified with an ID, e.g.: VWGOLF7. Let's create our entry in the dictionary:
When you create a dictionary, you don't need to cover cases as plural, tenses, etc. tagtog uses the dictionary entries and applies grammar rules to identify potential entities doing such modifications for you.
In order to upload a dictionary, you first need to create a dictionary. Click on New Dictionary under the entity type name and Save it. Two options will show up: Download Dictionary and Upload Dictionary.
Upload/Replace: you can use this option to upload a dictionary file. If the file was uploaded previously, it will be replaced with the new dictionary. Once you uploaded a dictionary, all new text imported is annotated automatically following the dictionary rules.
Download: you can use this option to download the dictionary being used in tagtog to your computer. This is very useful to make large edit operations and later replace the existing dictionary.
Dictionaries are automatically updated if a user adds new normalizations using the web editor. More information.
Relations
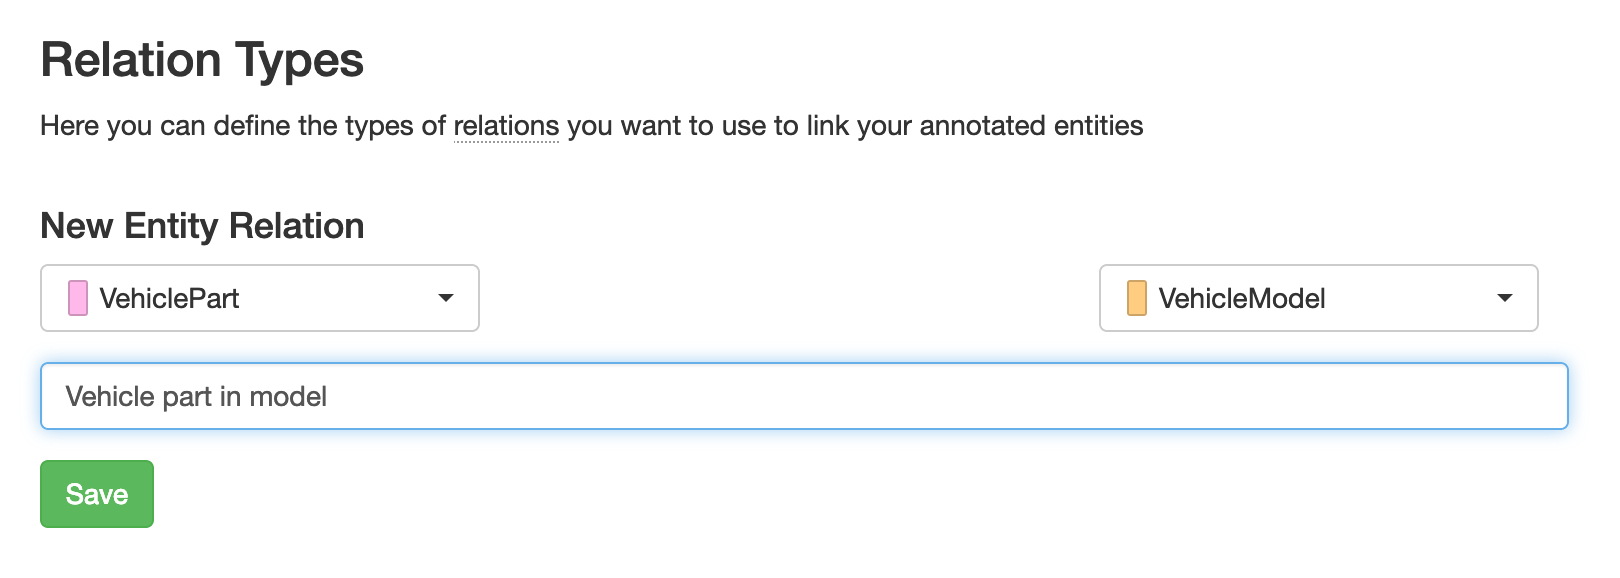
You can annotate relations in text. For that you must first create a new Relation Type by clicking the New Relation Type button. After just choose two Entity Types, those types you want to identify relations for. Optionally you can add a description for the relation. For example, a new relation type between vehicle parts and vehicle models.
Currently you cannot extract relations in text automatically. However, as a workaround, you can extract the entities automatically and based on the distance in text, infer a relation.
Document labels
These are tags (labels) that you associate to the whole document. This is useful for text classification / categorization (e.g. sentiment analysis).
To create a new Document Label, click on the button New Document Label. Then, write a name for the label (required), type (required), and description (optional).
You can create different types of Document Labels:
| Type | Description |
|---|---|
boolean |
The simplest label. Basically you mark the document as True or False for a specific condition. e.g. should this customer request go to the technical department? Yes or No. |
string |
One or more words describing a document. This is particularly handy whether you don't have a specific list of options or if you do, it might change often. e.g. which disease is related to this clinical profile? You can also use the string type to attach any meta information, e.g.: comments, URLs, json data, etc. |
enum |
list of options which can describe a document. In this case, the options must be written in the description of the label separated by commas. e.g. an error's severity could be broken down as: low, medium, high, critical. |

Example: setting a document label of enum type.
Entity labels
Labels used to add attributes to existing entities. It is usual some attributes make sense only to some entity types (e.g. gender for person, not for city), you can assign an entity label to one specific entity type or all entity types.
To create a new Entity Label, click on the button New Document Label. Then, write a name for the label (required), type (required), entity type you want to assign the label to (required), and a description (optional).
You can create different types of Entity Labels:
| Type | Description |
|---|---|
boolean |
The simplest label. Basically you mark an entity as True or False for a specific condition. e.g. if you are dealing with financial reports, you can annotate organization names and add an attribute Bankruptcy with value True to those organizations going bankrupt. You can later train a model that identifies in text companies that went bankrupt. |
string |
One or more words describing an entity. This is particularly handy whether you don't have a specific list of options or if you do, it might change often. e.g. you can add comments to entities. |
enum |
list of options to describe an entity. In this case the options should be written in the description of the label separated by commas. e.g. if you are processing CVs you could add an entity label to the entities identifying skills. This enum entity label skill type have the values soft skill and hard skill. |

Setting two entity labels. The first with the enum type can be only set for entities with the type VehiclePart. The second with the string type can be set for all entity types.
By default, the new entity labels will be assigned to all entity types. Otherwise, you can choose or filter an entity type from the list of entity types.
Once saved, you can start using them on the web editor. When you add a label to an entity, remember that only those labels related to the entity type of the entity will show.
Soon you will be able to generate entity labels automatically within tagtog.
Webhooks
What is a webhook?
A webhook is a notification mechanism that allows your system to receive events from a different service in real-time. Event notifications are sent via HTTP POST requests to an endpoint defined by you.
Think of it as an SMS notification. You make a change to your bank account details (event), and you receive an SMS asking you for confirmation (event notification). When you opened your bank account, you gave your phone number (endpoint), so they know how to reach you.
Webhooks in tagtog
The webhooks are useful to integrate your system or models with tagtog. You can define webhooks to notify automatically an external system right after a specific action was performed using tagtog GUI or API.
Only users with the role admin (or a custom role with enough permissions) can see/edit these project settings.
In tagtog, there are two events that trigger an event notification:
Import new document: an event notification is sent once a user uploads a document. Use this notification, for example, to annotate the document using your models and push the annotated document back to tagtog.
Save a document: an event notification is sent once a user saves a document. Use this notification, for example, to get the annotations done by your team and add them to your training data.
| Event | Description | Source |
|---|---|---|
| Import new document | A notification is sent when the user uploads a document. |
GUI and API
|
| Save document | A notification is sent when the user saves a document. |
GUI and API (update annotations via API) |
When any of those events are triggered, we'll send a HTTP POST payload to the webhook's configured End Point URL.
We also send information in the delivery HTTP headers for you to better process the event:
| Header | Description |
|---|---|
X-tagtog-onPushSave-source |
Source of the event. Possible values: GUI, API
|
X-tagtog-onPushSave-status |
Type of event. Possible values: created, updated
|
This is the required information to configure a webhook:
| Field | Description |
|---|---|
| End Point | URL pointing to the external system |
| Format | Format of the payload to be sent to the End Point. Currently you can select:
|
| Only GUI trigger | Check it if you want only GUI changes to trigger the webhook. Leave it unchecked if you want that both, API and GUI changes, trigger the webhook. |
| Authentication |
|

How to test webhooks locally?
To easily expose your app externally, you can use ngrok. This tool forwards the incoming requests to your local app. If you are using our Cloud, this tool will make easier for tagtog.com to reach your app.
A full example
In this step-by-step guide you will find a end-to-end example in Python about how to connect your models to tagtog using webhooks: Connect your NLP models to tagtog using webhooks. Here you can find the GitHub repository: demo-webhooks
Annotations
Pre-selections
Here you can decide the default settings for: pre-selections, pre-deselections, and their case sensitivity. You can always change these settings on the web editor toolbar for a specific document.
Machine Learning (tagtog ML)
Each time you press the button  in the annotation editor, a tagtog ML model gets trained in the background with all the confirmed project documents. Next time you upload a new document, this model will predict new annotations based on the training data. You can remove or add new annotations to continue training the model and get more accurate results.
If activated, tagtog machine learning will start annotating automatically from the first document confirmed. No deployments or complex configurations are required, just by annotating you can train a use a tagtog machine learning model.
If you don't want to use tagtog machine learning, deactivate this option.
More information on how tagtog ML works.
Check this option to annotate directly over the native PDF document. This web interface only works with PDF files. If this option is unchecked, only the plain text stripped from the PDF is annotatable.
Take into consideration that if the PDF file is imported with the option unchecked, only the plain text version will be available for annotation. If you import the file with this option checked, both versions will be available: the native PDF annotation and the plain text annotation when the option is unchecked.
Find more information of the PDF annotation tool here.
Members
In this panel, project admins (or a custom role with enough permissions) can invite and manage project members. All added project members will be able to collaborate in the same project-scoped annotation task. See for more info about roles and collaborative annotation.
Invite other users to collaborate in your project.
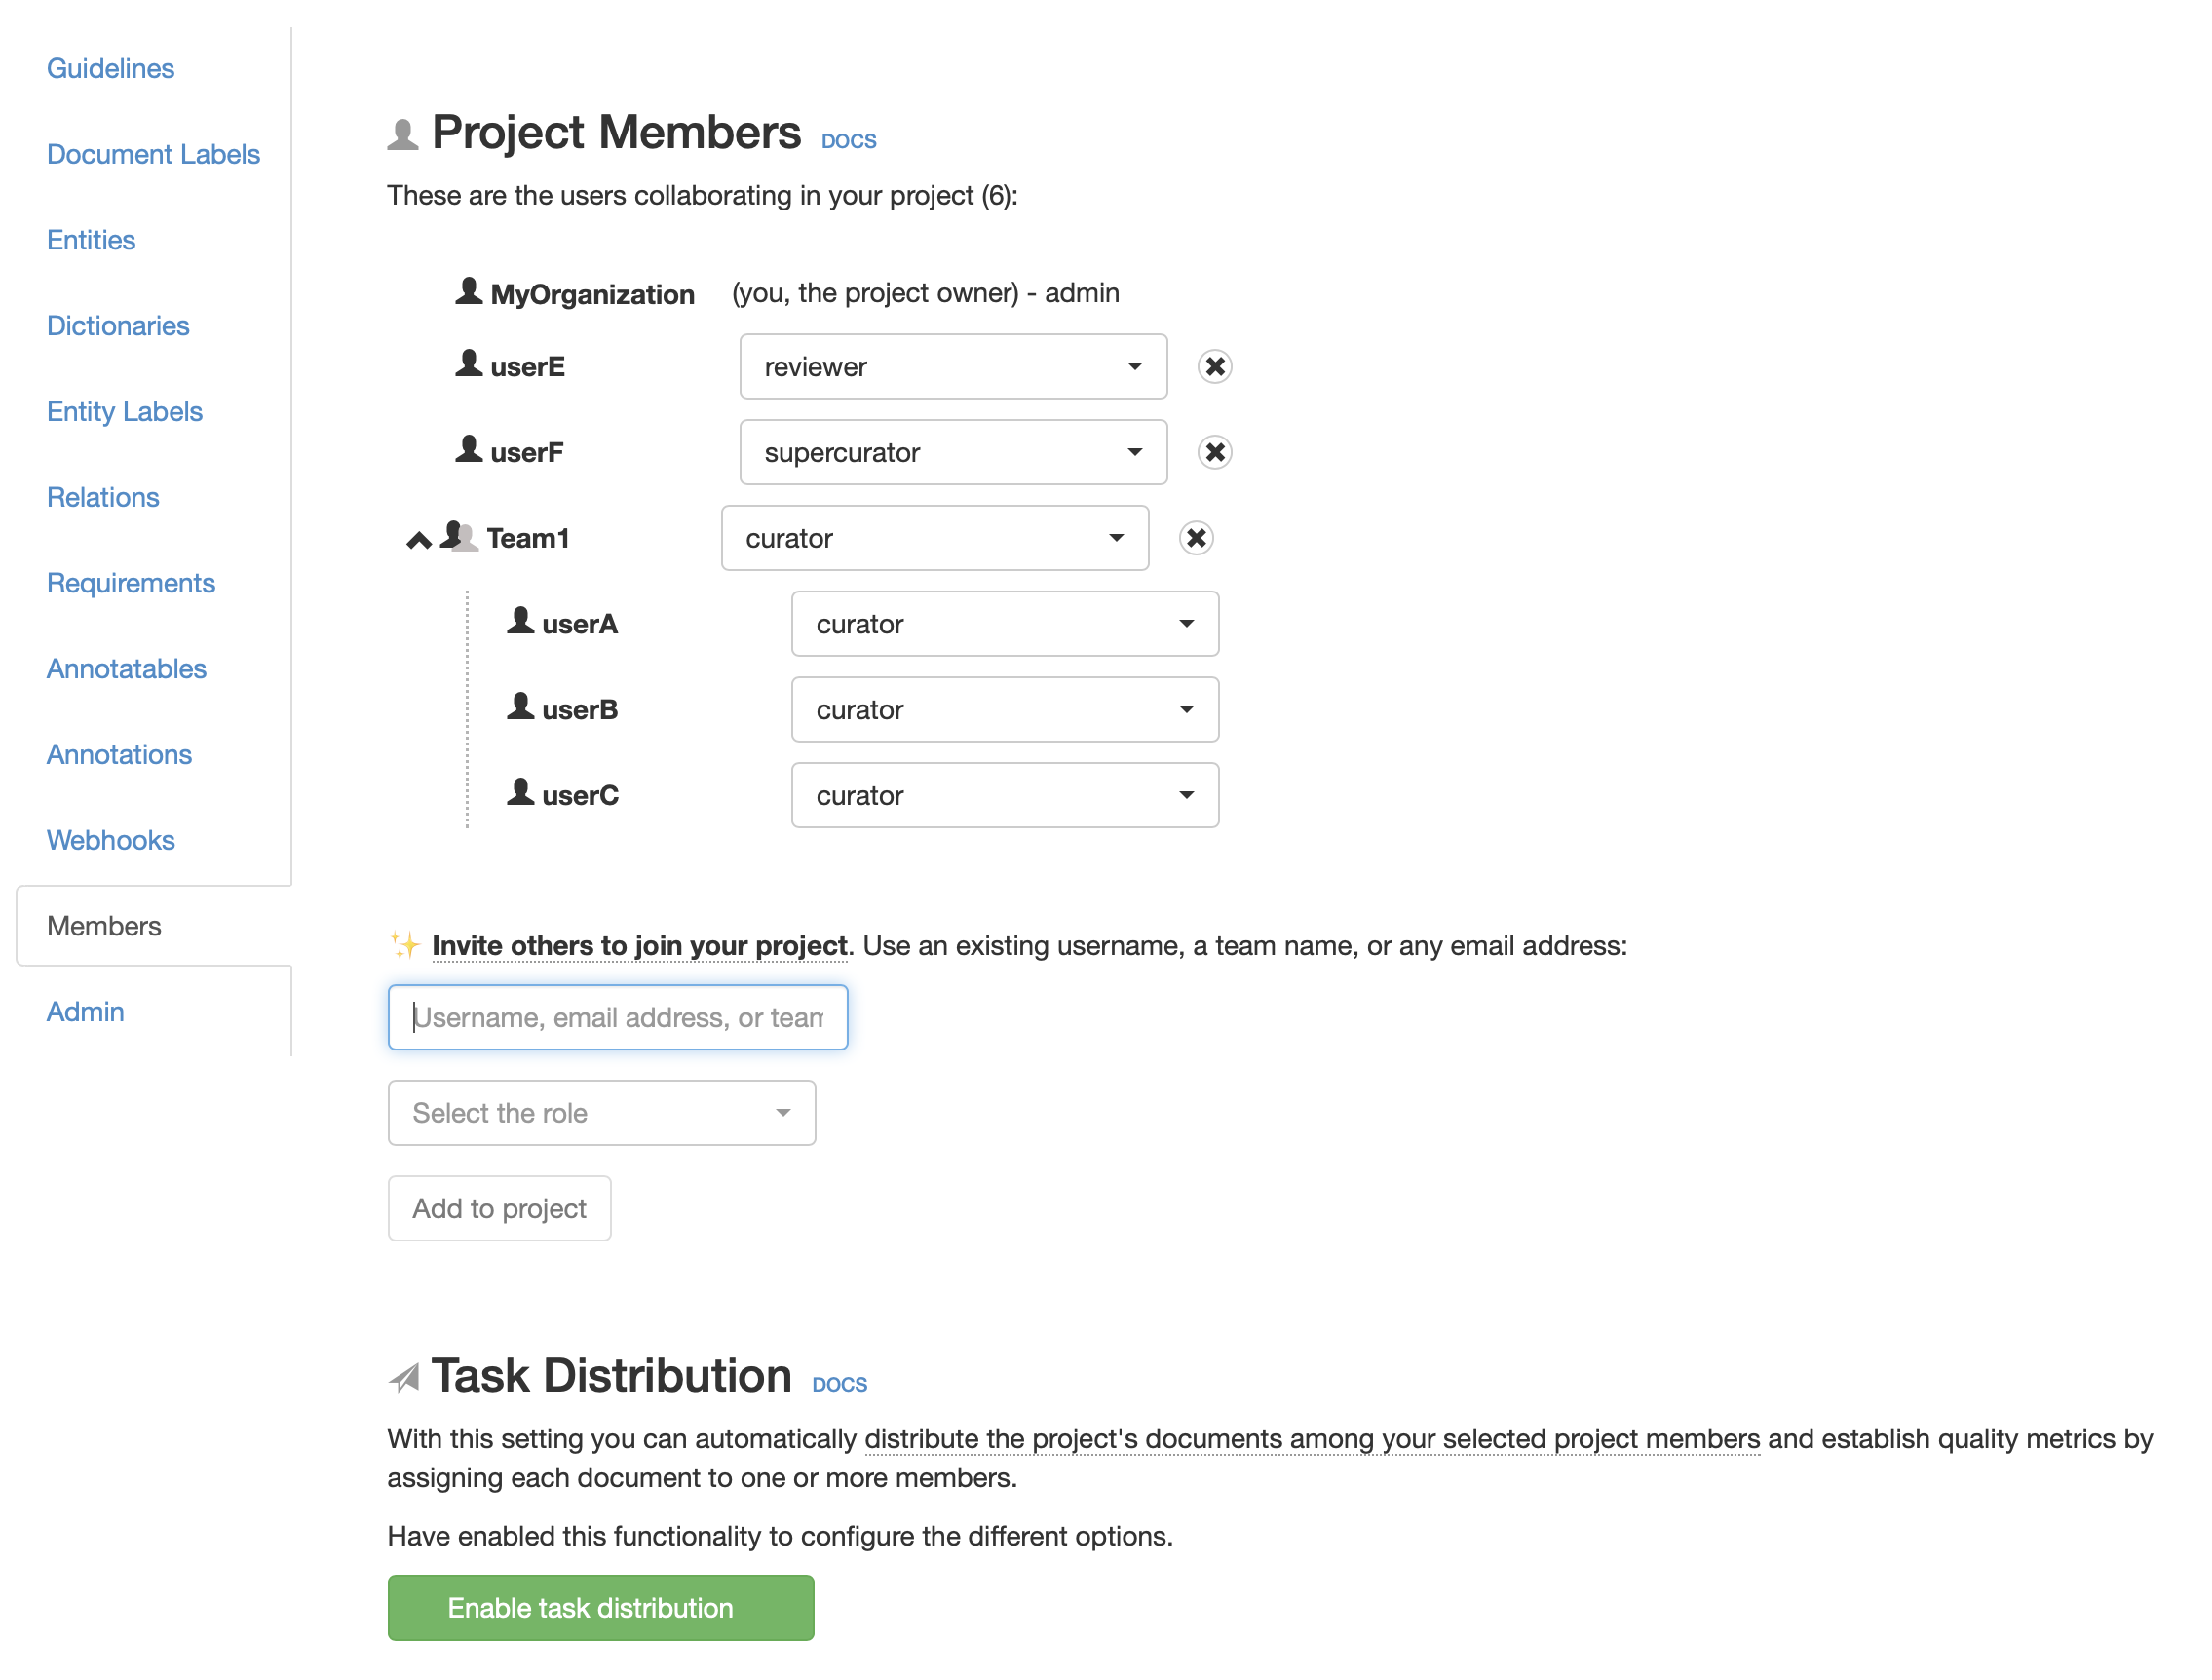
Add members & teams to your project
To add a new member: 1) simply write the tagtog username, or their email associated to their tagtog account, or any email address (for those who don't have an account in tagtog yet) in the input box, 2) choose the role, and 3) click on Add Member. Once added, those emails who don't have an account at tagtog yet, will receive a link to create an account and join the project. Already existing users will receive an email notification.
To add a new team (and its users/members): just write the team's name in the input box, and add it. Everything works the same as when adding individual members.
Update members & teams in your project
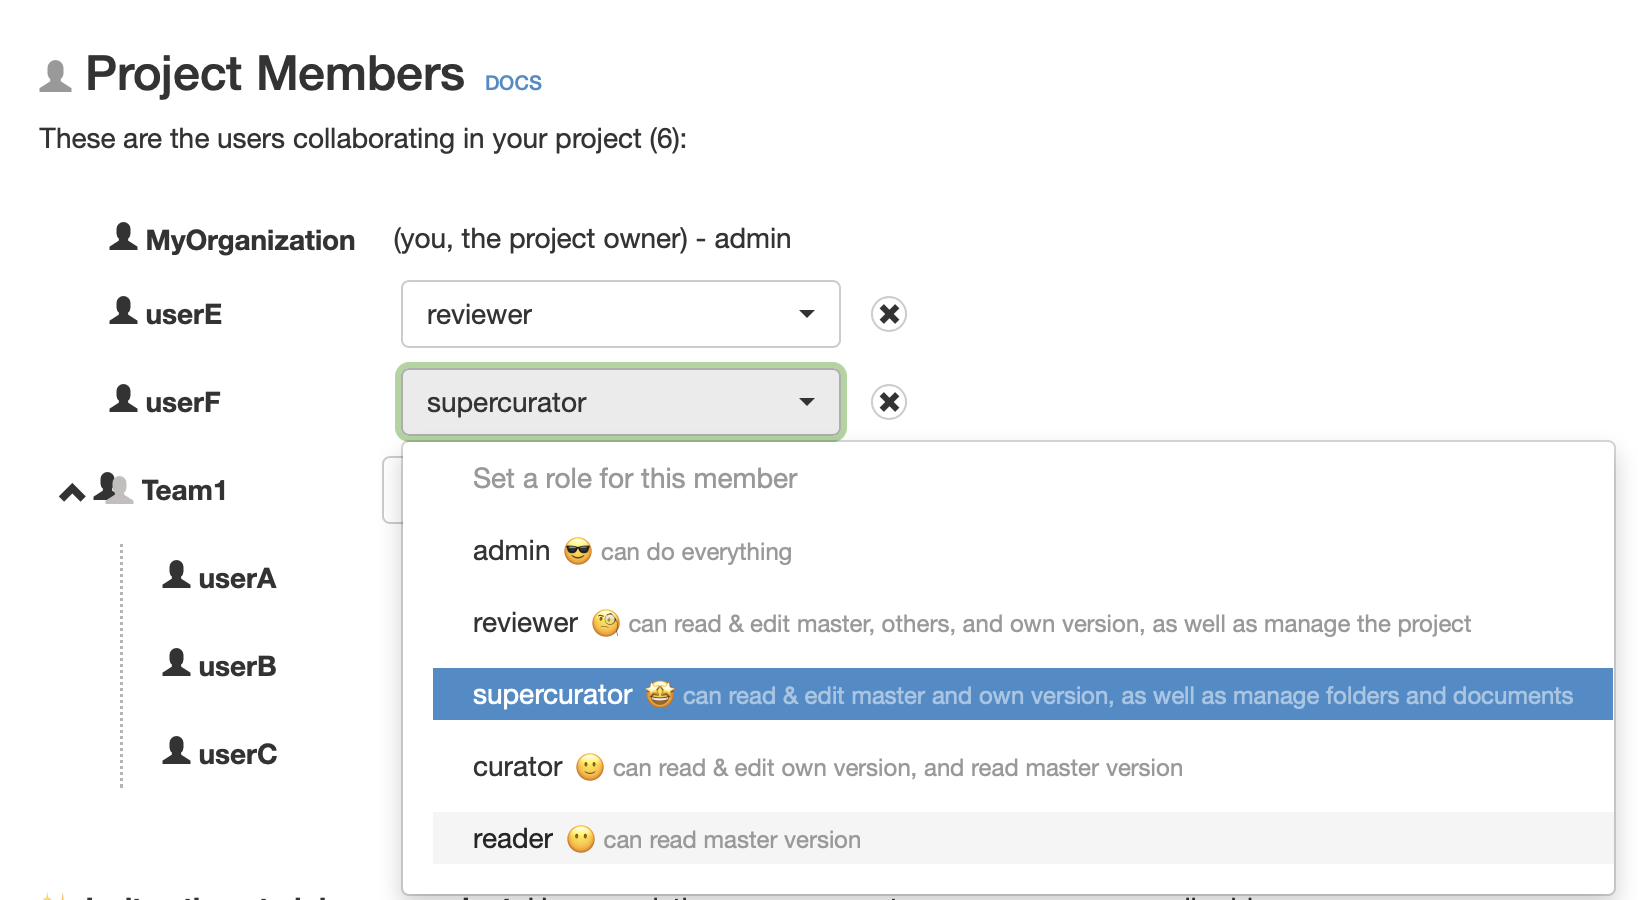
At any time, you can change the role of an individual member or of an entire team. To do so, just click on the member/team's role, and select in the shown dropdown the desired new role.
You can change the roles of individual members and entire teams.
When you change the role of a team, you change the role of all its users. Additionally, if desired, you can change the role of the team users independently. This will allow you to set all the team's users to share some equal role (say "curator"), but a few of them, which might have different roles (say "supercurator").
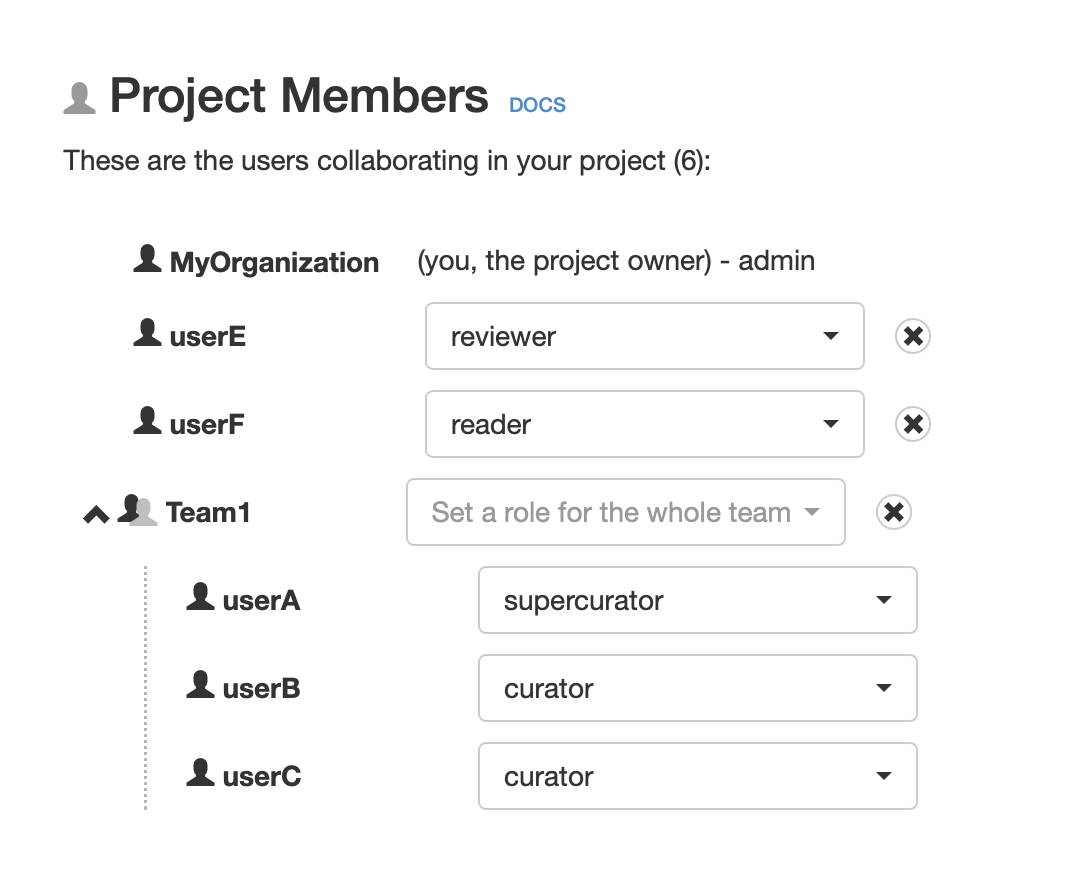
You can also change the role of the team's users independently.
Delete members & teams from your project
To delete an existing project member (or project team) just click on its associated removal button x. You will be asked in a 2nd-step dialog to confirm that you do want to delete the project member.
Important: the removal of project members/teams cannot be undone! Please make sure you have downloaded their annotations before, or that you have merged their annotations into the master version.
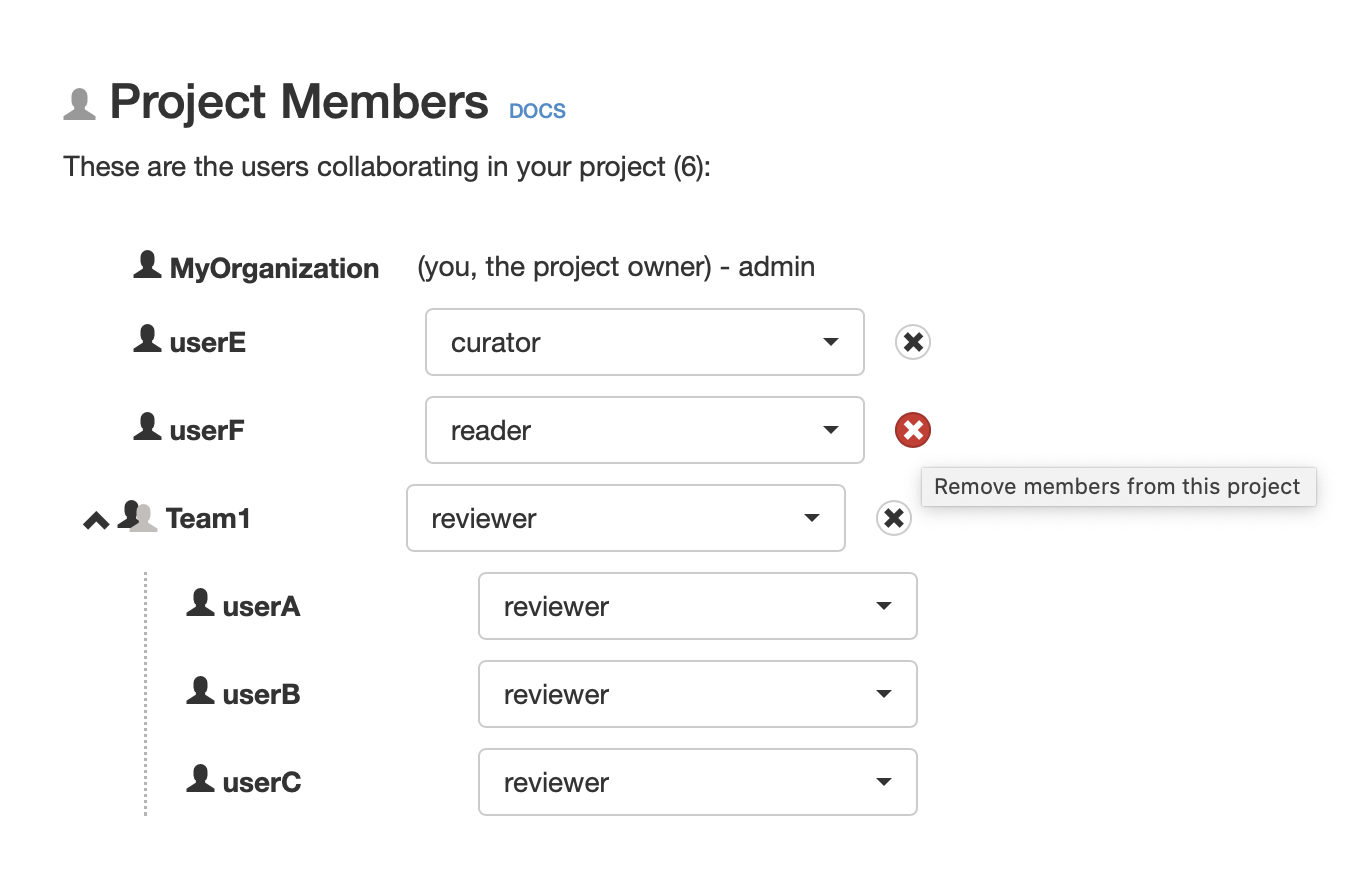
Delete existing project members.
Task distribution
With this feature, you can automatically distribute (assign) uploaded documents to selected project members. For example, if you choose 2 annotators, every uploaded document will be randomly allocated to 2 annotators; that is, every document will have to be annotated by at least 2 annotators. You can choose between different flows to annotate documents in your team. Find here the options.
Annotating the same document by 2 or more members is recommended to increase the overall quality of your annotation project. By using it, tagtog compares the annotations from different annotators to calculate their level of agreement (inter-annotator agreement or IAA) automatically, a good indicator of quality. For more information about quality management at tagtog, go here.
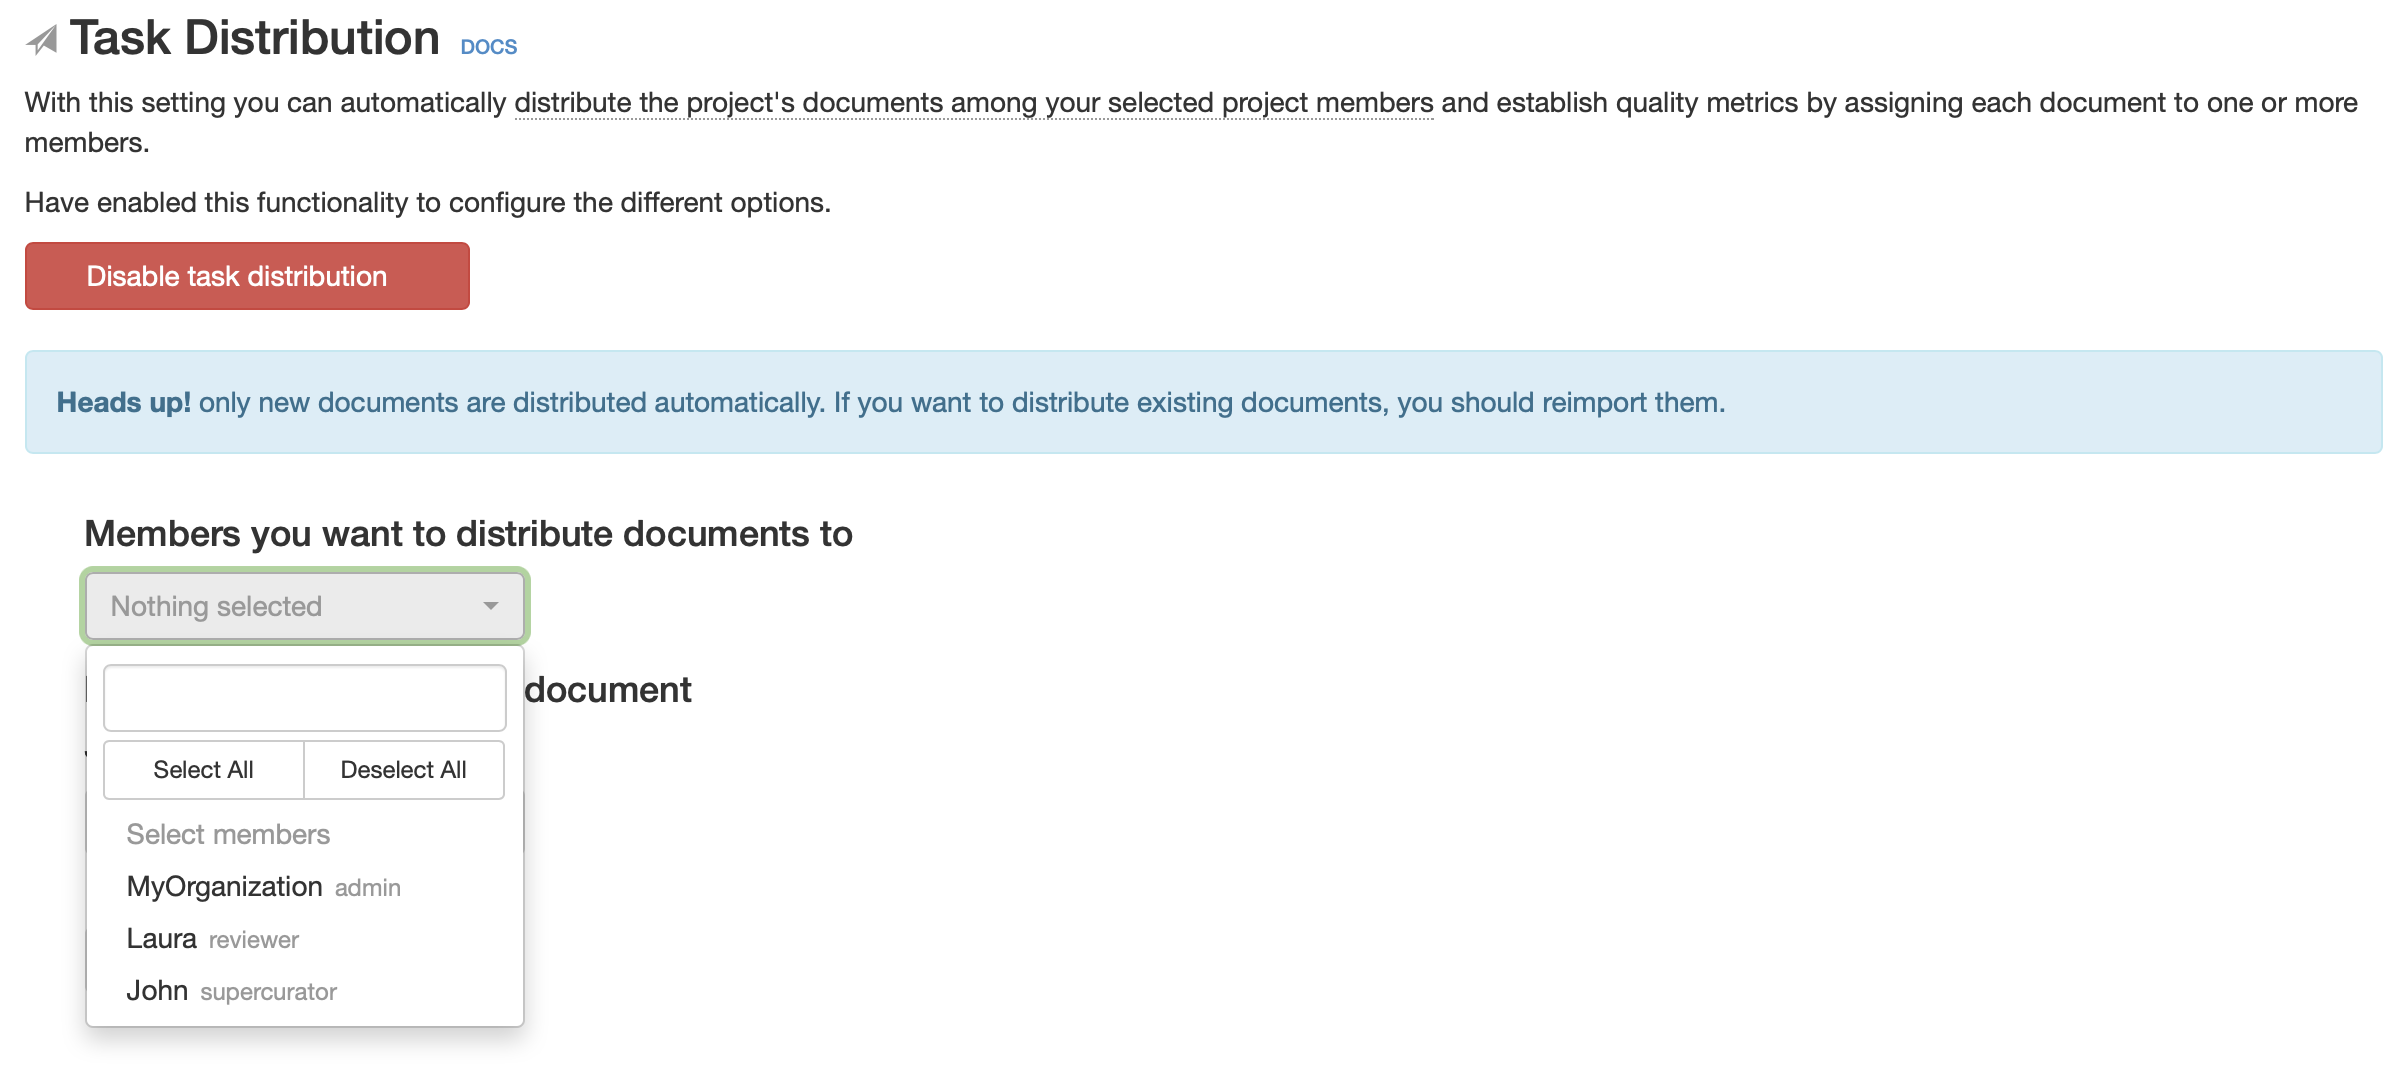
Task Distribution: assign documents to your labelers as soon they are uploaded.
To start task distribution, first you need to enable the feature. Then:
1Select the members you want to distribute documents to (the system only distributes documents to these users).
2Select the number of annotators per document (how many of the selected users will annotate each document).
To keep track of the project quality, even if you set the task distribution as one annotator per document (each document is assigned to a different annotator), tagtog automatically tries to allocate 5% of your documents to two annotators to calculate IAA.
By default, task distribution is turned off. This means that uploaded documents do not get distributed.
You can find below the differences between a project with task distribution active or not:
| Feature |
|
|
|---|---|---|
| Default annotations version | Members are redirected to their own version of the annotations when they open a document | Members are redirected to the |
| Default search filter | Members see by default the special search |
No search filter active |
| Track document progress | In the document list, members see a progress wheel indicating how many of the assigned members confirmed the document. If you hover over this wheel, you see the list of members assigned to the document, and who confirmed it. |
Document progress is not displayed. |
| Document distribution | At the document view, in the document member list, the members’ versions are split into two groups: members assigned to the document (“Assigned”) and members that are not assigned to the document (“Other”). |
At the document view, in the document member list, the members’ versions are not split into groups. All suitable members’ versions are listed. |
| Force document distribution | When you upload documents, you can select manually who you want to distribute the documents to. |
You cannot manually distribute documents. |
Requirements
Here you can set data requirements for your annotation tasks. These are enforced by tagtog to ensure your annotations comply with your data quality policies.
Only users with the role admin can see/edit these project settings.
There are different types of requirements available:
Required labels on file upload
You can upload files with predefined document labels. By default, no document label is selected. You can select one or more document labels if you want to ensure that always a file is uploaded using the GUI, these labels are defined.
Admin
Only users with the role admin can see/edit these project settings.
Export settings
Export the project's settings (entity types, relation types, entity labels, document labels, etc.) as a JSON file to reuse as a template on new projects.
Import settings
Import another project's settings. This will overwrite your current settings and remove all your project's documents. This should be applied solely on new projects.
Edit Project Description
You can change the description of your project at any moment. Just type the new description and click on Save.
Change Privacy Settings
Switch your public project to private project or the other way around.
Remove a project
To remove a project, go to its Settings > Admin. Click on the Delete Project button. Please notice that removing a project will remove all the documents within the project.

Delete the project
Downloads
Your project has also a tab “Downloads” to… download stuff 😉. Depending on your role in the project, and whether the project is public or private, you will see different actionable buttons.
In particular, with the button Download All Documents (and their annotations) you can download as a Zip file all your project’s documents and their annotations (in anndoc format). This button is available only to project admins in private projects. It is available to all logged-in users in public projects. Moreover, an analogous button Download as Zip is present in all document searches and folders (“Documents” tab) to download as Zip the subset of documents that match the search.
In this section, you can also download a CSV file with the annotation status of your documents. This report lists in one column the document ids and in a second column the status of their master version (true if confirmed, false if not confirmed).
Other download actions are also available, including a reference to download documents using the API, and exporting the annotations legend.
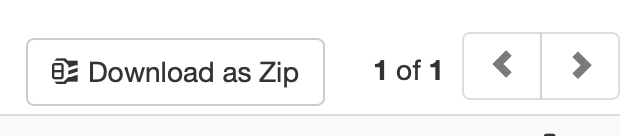
Download all project documents or a searched subset as Zip
Privacy
Projects in tagtog are either public or private. You can change your private project to public or your public project to private in the Admin Settings of your project.
Public projects
Public projects ![]() are open projects. Share your data with the entire world (Cloud) or across your organization (OnPremises). Give to your dataset transparency and visibility. It is also a good opportunity to attract other people to collaborate with you to build or maintain open datasets. In public projects:
are open projects. Share your data with the entire world (Cloud) or across your organization (OnPremises). Give to your dataset transparency and visibility. It is also a good opportunity to attract other people to collaborate with you to build or maintain open datasets. In public projects:
Anyone can see its documents and annotations (read-only).
Only registered users can download documents or annotations using the UI or the API.
Only the project members can make changes.
Private projects
In private projects ![]() , documents and annotations are kept private:
, documents and annotations are kept private:
Each private project is only visible to its members.
Only project members can make changes.